
A hunter understands the significance of a crystal-clear scope and the importance of good quality in the field, primarily because of varied weather conditions or a lack of an anticipated range.
If you want a reliable rifle scope to deliver complete accuracy, you should read our BSA Optics Sweet 17 Rifle Scope review.
Among the high-quality rifle scopes that have been hand-picked by experts, this one is worth checking out.
Hopefully, you can tell whether this scope gives you your money’s worth along with a great hunting experience in the field.
BSA Sweet 17 Rifle Scope Review
BSA is not the most well-known optics brand on the market, but it has its strengths.
It specializes in a wide range of rifles along with their associated accessories.
The brand is managed by professional hunters, making purchases reliable and simple.
Its scopes are developed for specific uses and provide advanced hunting optics at a reasonable cost.
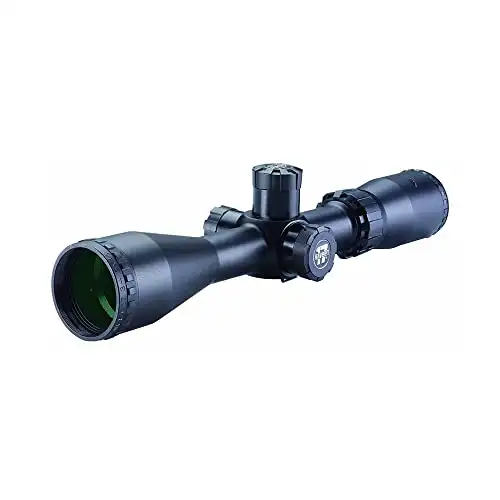
The BSA Sweet 17 Rifle Scope boasts trajectory adjustment technology, meticulously calibrated elevation drum increments, and a long-lasting build.
It is an excellent budget scope that is sturdy, holds zero, and has superb optical clarity.
Who Is This Product For?
This scope is for people who already have a rifle chambered 17 HMR.
Shooters who are working on a tight budget can definitely enjoy this scope’s value for money.
It can meet demands, whether you’re plinking or hunting a small game with it.
It is for someone who wants a scope that holds zero, offers ample magnification and durability.
What’s Included?
The BSA Sweet 17 Rifle Scope comes with a black matte turret with fully coated lenses.
It weighs approximately 1.1 pounds and has dimensions of 18.5 x 4 x 3 inches.
No other accessories are included, but you can purchase a carrying case separately.
Overview of the Features
The riflescope was exclusive to be calibrated for the 17 HMR bullet.
It gives you a flawless piece of glass constructed around this caliber.
You can fine-tune your shots by adjusting the parallax from 10 to infinity.
This feature lets you keep your reticle and desired trophy target all on the same focal plane.
During an all-day hunting trip, you can effortlessly zone in on targets from a distance with four inches of eye relief.
The optics on the BSA Sweet 17 Scope are quite good too.
It’s transparent and entirely multi-coated.
A conventional BSA duplex reticle greets you once you get past the glass.
It’s straightforward, minimalistic, and suitable for a wide range of shooting settings.
The aluminum tube is one inch in diameter and shockproof, waterproof, and fog proof.
To protect the glass, it also features screw-on lens caps.
It’s a little heavier at 1.1 pounds, but it attaches easily on weaver rails.
The 17 HMR bullet is suited for the elevation turret.
It’s designed exclusively for the caliber’s 17- and 20-grain bullets.
It is simple to zero, and once zeroed, it remains true.
The 0.25 MOA turrets are easily adjusted and emit a loud click sound when used.
It also includes a screw-on top to keep it safe.
Its magnification ranging from 3x to12x is ideal for close-to-long range shooting.
Pros:
- Easy shot calibration
- Perfect for varied settings and weather conditions
- Good aesthetics
- Durable; excellent ability to withstand trauma and shocks
Cons:
- Eye relief is not too impressive
- Magnification ring can be tighter than expected
How To Get the Most Out of It
To get the most out of this scope, you must learn to use and maintain it properly.
Install It Correctly
You may be curious about how the scope works, so here are a few steps you can follow to maximize your experience.
1. Focus
To focus the scope, place it between three and four inches from your eye.
Look towards the direction of a flat surface, an object, or in the sky.
2. Correct
You can correct poor focus on the reticle by loosening the eye bell lock-ring while gazing through the scope.
You can rotate the eyepiece in either direction until perfect focus is achieved.
Keep in mind that the focus may deteriorate when you turn in one direction only.
When this happens, turn the eyepiece in the other direction to fix it.
To achieve the sharpness of a flat and featureless surface, turn the terminal piece of the eyeball clockwise or counterclockwise.
If you compare the fast focus to the traditional eye bell method, the fast focus operates as a macro focus.
This indicates that fewer revolutions are required to achieve the desired effect.
3. Mount and Align
Practice safe firearm handling techniques at all times, especially when mounting a scope.
If you are using a rifle scope, make sure that your firearm is not loaded.
Then, mount the scope by separating the top and bottom components of the rings with a knife.
Next, install the bottom half of the pieces.
Placing the scope in the cradles produced by the bottom ring halves and aiming it toward the objective lens is an excellent way to start.
To put the elevation turret on top of the scope, rotate the scope.
While holding the rifle in a firm rest posture, slowly bring the scope closer to the eye until the entire field of view is visible, then release.
Verify that the reticle is oriented correctly.
It is possible to align the vertical post of the reticle with a corner of a wall, a lamppost, or the vertical axis of the rifle.
These are alternatives if an optical collimator is not available to align the post with.
At short ranges, misalignment of the reticle will have little effect on accuracy.
However, at long ranges, it can become a serious problem.
4. Secure
Secure the rings to the base after aligning the scope with the axes.
Then tighten the top halves of the rings and the bottom halves of the rings.
It is important not to overtighten the rings as this might cause damage to the scope.
Pay attention to this to avoid reduced performance or the inability to operate.
5. Check
Check to see that the scope does not come into contact with the rifle.
Make sure that no part of it interferes with the operation of the action of the weapon.
6. Set and Adjust
If you need to zero the scope manually, start by removing the bolt from the pistol by opening the firearm’s action.
Variable-power scopes should be set to mid-power.
Set the target in the center of a clear field of vision.
Adjust the elevation screws and windage to ensure that the image at the center of your bore is the same as your reticle’s center.
You can choose to use an optical collimator if your rifle is not a bolt action.
Just make sure to stick to the collimator’s directions as well as the safety guidelines.
You should use the scope’s windage and elevation turrets to make the micro-adjustments as necessary.
To complete the process, apply the balance of windage and elevation adjustment.
Making substantial changes in modest increments will help prevent damage to the scope’s spring from occurring.
When using a bore sighting collimator or any other bore blocking device, you must remove them before continuing.
Set the scale on the parallax to the 100-yard mark to make them more accurate.
Variable-power scopes should be set to their maximum power.
7. Check
Fire three shots at a target 100 yards away from a steady resting position to complete the course.
Examine the point of impact on the target and adjust the windage and elevation screws as necessary to achieve the desired result.
If required, repeat the process.
When measuring distances other than 100 yards, use the following formula to determine the click value.
Divide the distance in yards by 100.
Get the result and multiply it by the click value specified on the elevation dial plates and windage.
You will get the scope’s real click value at the shooting distance.
If necessary, replace the windage and elevation caps after zeroing the weapon.
Follow Proper Maintenance Procedures
In terms of safekeeping and maintenance, make sure to avoid disassembling or cleaning the scope from the inside.
If the scope has to be repaired or adjusted, check detailed instructions on how to do so.
Cleaning the external optical surfaces should be done regularly with the lens cloth.
You can go for a soft lint-free cloth or with optical quality lens paper.
When the scope is not in use, it is essential to keep the protective lens covers on.
Remove any dirt or sand from the outside with a soft brush to avoid harming the finish.
After wiping the scope with a damp towel, wipe it again with a dry one. Lastly, store it in a dry and cool location.
BSA 3-12X40 Sweet 17 Rifle Scope with Multi-Grain Turret
$126.62
Alternative
Vortex Optics Diamondback 4-12×40

If you are looking for almost the same features but unique aesthetics, you can try the Vortex Optics Diamondback 4-12×40.
It is a solid one-piece tube with a hard-anodized finish that creates a shockproof and durable scope.
It also helps in the camouflage of the shooter’s position in the setting.
| Product Image | Product Name / Primary Rating / Price | Primary Button / Secondary Button |
|---|---|---|
|
|
||
|
|
11/07/2022 07:25 pm GMT
BSA Optics Sweet 17 Rifle Scope Review: The Verdict
When you’re out in the field for long-range hunting, or low light or nighttime shooting, make sure you can see clearly.
You must also not encounter struggles to focus your rifle.
Fortunately, some low-cost scopes, like the BSA Sweet 17 Rife Scope, are not necessarily of poor quality.
With all of the BSA Sweet 17 Rifle Scope’s advantages, we can say that it is worth the investment.