
- How to mount a scope
- Taking off the old Rifle Scope
- What tools will I need for mounting a new scope?
- Mounting a new Scope on different guns
- Choosing the right scope mounts to use
- How to mount a rifle scope onto an AR15 or AR10 or any rifle using a rail
- Using Loctite with scope installation.
- How to mount a rifle scope on a Remington 700
- Adjusting the Ocular Focus on your new Rifle Scope
- Setting the Bench Zero after mounting a new scope
- Sighting in a new scope at the Range
- Routine Scope maintenance
How to mount a scope
So, you just bought the new scope you always wanted and now you need to get it onto the gun. Mounting a scope is not hard, but how do you correctly mount and set up the scope? In this article, I will walk you through the process, step by step. Most people will be able to correctly mount and adjust their new scope at home.
Taking off the old Rifle Scope
If your rifle already has an existing rifle scope on it will need to be removed. There are two ways to remove the old rifle scope. If the existing scope tube diameter is the same as your new scope, then you may be able to use the existing scope rings. If the new scope tube diameter is bigger or smaller than the old scope or it has a larger objective lens then you will most likely need to remove the entire package from the rifle.

What tools will I need for mounting a new scope?
Before you tackle the job, you will need to make sure that you have the right tools on hand for the job. You will need the following:
- High-quality screwdriver set. Low-quality screwdrivers usually do not fit the fasteners well. When the screwdriver tip does not fit the screw, it will damage it.
- Torx driver bits. Most scope rings now days use Torx type fasteners to hold the scope rings to the lower portion of the mount.
- ¼ Drive Socket Set, or at least a couple of sockets that will fit the scope mounting nuts used on single or one-piece mounts
- Small Torque wrench calibrated in Inch pounds
- Small Level or gun level set

Optional tools
- Gun Vise to securely hold the rifle level
- Magazine vice mount for AR15 or AR10 models
When it comes to the tools to do the job, good quality makes all the difference. The other thing to remember is that good quality tools will last you a lifetime. They will also make all of your projects that much easier to do as well.
This vise goes on your table. Get the one with legs if you do not have the room.

Mounting a new Scope on different guns
Not all rifles accept the same style of scope mounting. Rifles that use the 1913 Picatinny rail system or Weaver type are the easiest to mount a scope to. Other rifles like the Remington 700, may require an adaptor to be able to use the type of scope rings that you prefer.
Not all rifles come ready to have a scope attached. A rifle that does not have mounting holes already installed. Will need to be taken to a gunsmith to have the mounting holes added.
Weaver Scope Mounts Versus Picatinny Scope Mounts
The weaver and Picatinny mounts are very similar in design and look. They both use a combination of a dovetailed mounting system and a recoil lug to help control scope movement. The only real difference between the two mounts is the size of the slot on top of the rail where the recoil lug sits. The Picatinny style uses a 0.206″, (5.23 mm), slot while the weaver style uses a 0.180″, (4.57 mm), slot.
This means that a Weaver Ring set can be mounted to a Picatinny rail. However, a Picatinny mount cannot be mounted to a Weaver rail. I would always recommend using a Picatinny mount on a Picatinny rail. The reduced size of the recoil lug on the Weaver mount can allow the scope mount to move back and forth on the rail. This effect will be more noticeable on larger caliber rifles with larger recoil characteristics.
How to choose the best AR 10 scope mount, they will also work on AR 15’s as well
Choosing the right scope mounts to use
Choosing the right scope mount is an important part of installing a new scope. The scope mount is the connection between the rifle and the rifle scope. If the scope is not securely mounted or it is misaligned with the rifle it will result in inaccuracy. You can have the best rifle/scope combination in the world but if it is not mounted securely it will be inconsistent from shot to shot.

One-piece rifle scope mount versus individual scope mounts
When it comes to mounting to a Picatinny or Weaver rail system there are two choices of scope mounts, one-piece or two-piece.
One-piece Rifle Scope Mount
The one-piece mounts are typically used on the AR 15 and AR10 platforms. The one-piece rifle scope mount is a stronger design than individual scope rings. They are also more suited to rifles that have a higher recoil signature. The drawbacks of the one-piece rifle scope mount are they add more weight to the rifle. They can also be in the way of the bolt when using them on a bolt action rifle.

Two-piece or Individual Scope mounts
The biggest advantage of these is the flexibility they offer when installing onto the rifle. They allow for many different heights to better match the front objective size and the shooter’s height preference. Using individual scope rings allows for more flexibility in mounting positions. Finally, they are a lighter weight option.

The downside of individual scope rings is that they are not as strong as the one-piece version. When mounting the scope there can also be a chance of misalignment between each mount. Honing the rings will correct any misalignment. It will, however, require more work and tools to complete the install.
Scope mounting on Rifles without a Picatinny or Weaver Rail
Rifles that do not use a rail system will use either the Leupold style scope mounting system or a rifle specific mount system. The Leupold system, (Also used by Redfield, Burris, and most other scope and bolt action rifle companies), consists of two individual rings and a base. The scope rings are mounted to the rifle using the steel base. They are pretty straight forward and will allow for interference-free operation of the rifle. The only real choice required for these is matching the right height of the rings to the scope and your preference.

Choosing the Right Scope Ring Height
When choosing a scope ring height, ideally it should be as low as possible. The biggest factor in choosing the scope ring height is the front objective lens. The height needs to be tall enough so that the front lens and lens cap do not hit the barrel or rail. The next concern is the stock height and whether the shooter can get a clear view through the scope. This is not a concern for rifles with an adjustable cheekpiece.
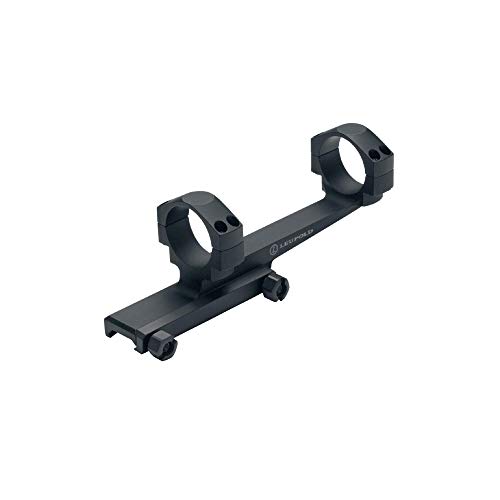
For owners of one of the most popular rifle actions on the market, the Leupold Remington 700 Backcountry 2-PC Rifle Mount makes installing an optic easier than ever

List of objective sizes and their corresponding suggested ring heights
40 mm and below scopes = low mount scope rings
41 – 45 mm Scopes = Medium Height when using standard barrel contours
46 – 50 mm Scopes = High or Extra High scope rings depending on barrel profiles
51 mm and above = Extra High scope rings
A good set of scopes rings is essential to an accurate rifle. Choose from multiple tube sizes and heights from different manufacturers

How to mount a rifle scope onto an AR15 or AR10 or any rifle using a rail
When mounting a scope onto a AR 15 or AR 10 you are going to be better off choosing a one-piece mount. Leupold offers their “Mark AR” series of scope mounts for Flattop AR 15 and AR 10 models. The cantilever mounts provide the optimum scope height. While providing the ideal eye relief. The cantilevered design allows the scope to be moved forward while keeping the mounting system rearward. There are other manufacturers of similar scope mounts. However. I have used a number of the Leupold mounts and have never had any issues with them at all.
Step one: confirm the Ring size matches the scope tube size
Take the scope and the mounting system out of the box and confirm that the tube size matches the ring size.
Step two: Initial placement on the rail
Remove the screws that hold the ring caps on and place the scope into the mount. Place the ring caps onto the mount and loosely attach the screws. Do not tighten the screws at this time. Also do not use Loctite at this time. Center the scope between the two clamps. The scope should be able to move in the rings when applying light pressure.
Set the scope and mount assembly onto the Picatinny rail a lightly tighten the screws. At first, the placement is just the best guess to what looks right. The screws should be just tight enough so that it will not fall off the rail but not tight at this time.

Step three: final placement
To get the final placement you need to get behind the rifle and test that you can clearly see through the optic. Keep in mind that the magnification level will change the eye relief distance. So, make sure to try the scope on all the different magnification settings.

Making large adjustments
Make large adjustments at first, meaning moving the scope back and forth from slot to slot as needed. When looking through the optic you should be able to clearly see the entire lens view. If there is a black haze around the eyepiece move, your head back or forward until you can see clearly. Then move the scope either back or forward until the view is clear without moving your head.

Once you get the basic position on the rail it is time to tighten down the mounting screws. Do not worry if it is not perfect yet. The final adjustment is performed by moving the optic back or fourth in the rings. Before you fully tighten the mounting screws push the scope mount towards the muzzle to locate the recoil lugs hard up against the groove in the Picatinny rail. Then tighten the screws to 65” in/lbs, (always check the enclosed instructions for final torque values).
Step four: final adjustments and leveling
With the scope mount secured to the rail now, it is time to level the scope and perform the final checks on the eye relief. Make sure to check the eye relief in all positions that you plan to shoot from. With scopes that have high magnification values like 20x and above you may not be able to get the perfect eye relief on all power settings. So, choose the setting you plan on using the most, and set the eye relief to that setting. To make small adjustments for eye relief slide the scope back or forth until you get a clear view through the optic.

Before tightening the caps, the scope and the rifle need to be leveled. This ensures that when adjusting the elevation and windage on the scope that they track perfectly horizontally and perpendicular to each other. Start by placing a level across the Picatinny rail and adjust the gun until it is level. Then place the level on the elevation knob and level it. Be careful not to move the scope back or forward as it will change the eye relief setting.

Lastly, tighten the scope cap screws to 18” in/lbs to 25”in/lbs using a torque wrench. Make sure to always check the information provided with the scope or the mount as to correct torque values.
Using Loctite with scope installation.
It used to be said that Loctite was always required when installing a new scope. However, I am seeing more and more manufacturers advising against using it. Vortex says in their included instructions not to use Loctite when installing the scope ring cap screws. As it may result in excessive torque that can damage the scope tube. Warne scope mounts also say not to use Loctite on their ring cap screws.
Loctite 242 blue is a medium-strength Loctite that can be used on gun parts. Make sure to read the manufacturers instructions before using on scope mounting systems. Blue Loctite can be removed using standard hand tools without the need for heat.

In my experience hardware that is correctly torqued does not come loose between routine maintenance. The biggest mistake I see most people do is to not use a torque wrench to tighten mounting screws. This usually results in hardware that is too loose.
How to mount a rifle scope on a Remington 700
When installing a new scope on to a bolt action rifle you have a choice of what style of mount to use. There are several manufacturers that make Picatinny and Weaver rails that are direct bolt on to most bolt action rifles. If using a rail, follow the instruction steps 1 and 2 below for the rail. Then use the instructions above for mounting a scope to the rail. If using the Leupold Style mounting system, then read on.

Step one: Confirm all parts are correct
The first step is to confirm that the mounting system you have purchased matches the scope and the rifle you are fitting to.
Step two: mounting the base
Most rifles come predrilled and threaded ready to accept a scope mount. If the rifle has not previously had a scope mounted to it then it will most likely have block off screws installed in these holes. The screws are just to protect the threads. If the rifle is not predrilled with threaded holes, you will need to take it to a gunsmith to have that work performed.

Remove the blocking screws from the receiver. Then clean the screw threads and mounting surface with an alcohol-based cleaner to remove oils. Install the base and screws and torque to 14 in/lbs, always check any supplied instructions on the suggested or recommended torque setting. Also, read the Loctite note above.
Step three: Ring installation
The front rings in the Leupold style mounting system are installed by placing them at 90° to the rifle. Then rotate it to lock it in place. It will take some force to rotate the ring as it needs to be tight in the mount. It is often best to install a wooden dowel into the ring to be able to rotate it into place.

The rear ring can be either a dovetail style like the front one. Or it can be retained using a screw system. Install a rear dovetail ring in the same manner as the front ring. When using the screw system, the rear mount is clamped between the two screws. The mounting screws can also be used to fine-tune the windage setting on the scope.

Step four: lapping scope rings and checking alignment
When using a precision scope mount set lapping is not usually required. However, if you want to achieve maximum accuracy and repeatability it is not a bad idea to check the alignment and lap if needed. To check scope ring alignment, install indicator bars with the points facing each other. With the scope rings correctly aligned, the two points will be pointing at each other. If not, then it is a good idea to lap the rings. Follow the instructions in the lapping kit on how to correctly lap the scope rings.
After you have completed the lapping process it is important to thoroughly clean all the lapping compounds from the rifle. Also, make sure to mark the scope ring caps so they do not get mixed up. Before starting mark the ring caps. The caps should indicate front or rear, and the direction they were installed.

Step five: installing the scope and setting eye relief
Lay the optic on the lower rings and lightly install the caps. Do not tighten the rings down yet. Slide the scope back and forth until you have a clear view of the reticle with no black haze around it. Remember magnification will affect eye relief. So, test the scope placement on different power levels to find the best all-round eye relief setting.

Step six: Level and tighten the scope
Before tightening the caps, the scope and the rifle need to be leveled. This ensures that when adjusting the elevation and windage on the scope that they track perfectly horizontally and perpendicular to each other. This is where a gun vise comes in handy to hold the rifle. You can, however, hold the rifle differently if you do not have access to a gun vise.
Using a cardboard box and cutting a vee into it is a popular way to support a bolt action rifle while attaching a scope. Another method is to carefully clamp the barrel into a standard bench vise using soft jaws. Be careful not to damage the barrel or clamp it too tightly.
The scope leveling tool attaches to the barrel and then using the small level check and adjust the scope to match the rifle

With the rifle leveled place a level on the scope’s elevation knob. With the scope leveled carefully tighten the scope ring screws to 18 – 25 In/lbs in a cross pattern. Always confirm the tightening torque with the information included with the scope and mount.
Adjusting the Ocular Focus on your new Rifle Scope
With the scope securely mounted to the rifle, the next step is to set the ocular focus. The ocular focus adjustment is located at the eyepiece end. The purpose of this adjustment is to focus the scope’s reticle to your eye. This is a one-time setting. Different shooters will have different focus settings.
To adjust the focus, have someone hold a piece of white paper in front of the objective lens. You can also aim at a blank wall in your house. Close your eyes for a few seconds, then open them and look through the scope. The reticle should be crisp and in focus the second you open your eyes. If not, then you will need to adjust the focus.

Move the focus knob at the back of the scope until the reticle is crisp then close your eyes. When you open your eyes, the reticle should be crisp clear and in focus. If the reticle is not clear and in focus as soon as your eyes open, then repeat the process.
Why can’t I just look through the sight and set the reticle focus?
Our eyes are very adaptive. And if we look at something that is not quite clear but is close, they will try to adapt. So, if we continue to look at the reticle our eyes will compensate for the lack of focus. If we shoot with a reticle that is not in focus it will place a strain on our eye and will result in early shooter fatigue. It will make it harder to get a quick target acquisition.
Setting the Bench Zero after mounting a new scope
Now that the scope is mounted, and the ocular focus is set it’s time to do a bench set on the scope. The only purpose of a bench set is so that it can get us on to the target with the first round. A bench set does not mean the rifle and scope are sighted in.

There are several different tools and methods that can be used to set the initial bench set on the scope. On a bolt action rifle, you can simply take the bolt out and look down the barrel. Then adjust the optic until you see the same point with the crosshairs.
- Guaranteed superior accuracy with a lifetime warranty
- Fits all calibers from .22 to .50 cal. plus 20 & 12 ga. Shotguns
- Class IIIa Laser Product, less than 5.0mW power output
- Includes the SRL Scope Leveler to level your crosshairs before boresighting

Using a laser pointer that fits into the bore is also a good method to apply a base scope set. Remember this is just to get you on the target. Follow the instructions that come with the tool you choose and adjust the scope as required.

Sighting in a new scope at the Range
The last part of the process is to do the final sight in at the range. Make sure that you are using a match grade ammunition and that it matches what you normally shoot. Changes in ammunition will change the point of impact of the bullet.
Step one: first round
Using the largest available target set out at your intended zero range. Using a large target will increase the odds of the round hitting it. Proceed to fire one shot.

Step two: adjustment
There are two ways to make adjustments to the scope here. If you used a bench rest simply place the reticle on your aiming point and then adjust the scope until the crosshairs are on the bullet impact point.

Another method is to use a Mil calibrated reticle to measure the POI in relationship to the aiming point. This can be in a spotting scope or the rifle scope. Then adjust the elevation and windage knobs by those amounts.
Step three: fine-tuning
Fire a three-round string to confirm zero. If the POI impact needs to be moved, make the adjustment then fire another 3 round string.
Step Four: Zeroing the scope windage and elevation knobs.
Once you are happy with the POI of your scope the last task is to zero the scope knobs. Not all Scopes will give you this option. There are also several different ways of zeroing based on the manufacturer of the scope. So always refer to the scope’s instruction manual for details.

One of the most common ways used to zero scope knobs is to loosen a set screw in the knob. Then twist the knob until it is in the desired place and tighten the set screw. Make sure to tighten the screws correctly after adjusting.
Routine Scope maintenance
It is a good idea to routinely re-check your scopes zero. Especially if you change ammunition or locations where you shoot. These types of changes can result in POI changes. Altitude and humidity changes will affect bullet drop resulting in different points of impact.
It is also important to re-check the scope mount tightening torques. Make sure to use a torque wrench to go over the fasteners when cleaning the rifle.
After use, the scope lens should be cleaned using a
Stay safe and shoot often