
- Why do we need to clean the rifle?
- AR 15 cleaning frequency
- AR 15 cleaning: Light use field strip only
- Full cleaning procedure for the AR-15
- The Bolt Carrier Group
- Inspection process.
- Reassembling the AR 15 Bolt Carrier
- AR 15 Cleaning: The Upper housing Assembly
- Inspection of Upper and Barrel assembly
- Re-Assembling the Upper After Cleaning
- AR 15 cleaning: The lower assembly
- Re-Assembling the Lower Assembly
- AR 15 Cleaning: Final Assembly
- Magazine service
- AR 15 Cleaning Supplies and Tools
The AR 15 like any machine will require regular cleaning and maintenance to keep it working well. The environment that the rifle is being used in will affect the cleaning frequency and materials used. In this article, we will go over the tools needed, procedures, and inspection points you should be covering each time the rifle is serviced.
Before starting any cleaning, operations make sure that the rifle is unloaded and made safe. As a general rule of thumb, it is best to not even have any ammunition in the same room as where you are cleaning. Make sure to remove the magazine first before pulling back the bolt to check for a round in the chamber. Safety is paramount and no one ever wants to have an accidental discharge, ever.
Why do we need to clean the rifle?
The AR-15 is a gas-operated rifle. Also known as Direct impingement rifle. This means that each time the rifle is fired hot gases from the cartridge will be directed into the bolt carrier group. The gas pushes the bolt back unlocking it and causing the gun to cycle. The gas also carries with it by-products of combustion, powder residue and copper particles from the bullet jacket. All of this debris will eventually end up clogging up the action causing failures.

Outside debris from environmental conditions will also affect your rifle’s operation. Living in a dry dusty climate can result in fine dust particles getting into the rifles working parts. This can cause a failure to fire or cycle. Wet humid conditions can result in corrosion build up on working parts. This can also cause failure to fire or failure to feed issues. For these reasons alone even if the rifle was not fired but was only carried in the field it is still a good idea to still clean and inspect regularly.
AR 15 cleaning frequency
Your AR 15 cleaning schedule is going to be based on usage and conditions where the rifle is being operated. How the rifle is used will also have an effect on the schedule. For example, a rifle that is used with a suppressor is going to need more cleaning than an unsuppressed rifle. This is because the amount of gas that enters the breach area when using a suppressor is more than double that of an unsuppressed rifle.

The amount of ammunition that has been fired, will impact what level of cleaning the rifle will require. For a light day at the range with between 50 to 100 rounds through the gun will and it should only require a quick wipe down. But a heavy day with 300 plus rounds down range is going to require a more thorough cleaning. One thing to also remember is when cleaning the rifle, you are also inspecting all of its parts for wear and damage.
AR 15 cleaning: Light use field strip only
A field strip of the rifle is something that can be done just about anywhere and without many tools or equipment. A field strip typically means just breaking the gun open and removing the bolt assembly only. Then wipe down the upper and lower receivers and applying a light oil. The bolt carrier is wiped down and lightly oiled then reinstalled. Typically, the bore and chamber get a quick brush and that is about it.
This kind of service should only be done for very light use. It is enough to keep a rifle functioning that is in good condition but that is about it.
Full cleaning procedure for the AR-15
The full cleaning procedure is what I will follow with all of my rifles after use. Most of our rifles are used with a suppressor and a normal day out is going to be a minimum of a couple of hundred rounds through the gun. This leaves them pretty dirty though still functional. The goal is to keep them functional and of course reliable and dependable.

The Bolt Carrier Group
The bolt carrier group is the single biggest cause of stoppages or failures in the field. It also does the lion share of the work. The bolt is directly exposed to hot, high-pressure gases. As well as mechanical pressures of cycling and firing. Every time I clean, I always completely disassemble and inspect all parts of the bolt carrier group.
- Open the rifle and remove the bolt carrier assembly
- Pull the cotter pin that retains the firing pin

- Remove the firing pin

- Rotate the bolt retainer pin 90 degrees that goes through the bolt and pull it out

- Slide the bolt out the front of the carrier

- On the bolt there is a small pin that holds the extractor in place, push it out of the bolt and remove the extractor. This will allow for proper cleaning or the bolt and inspection of the extractor.

Bolt Cleaning
Next comes the cleaning process. The way that I do it is by using a parts washer that allows me to get a really good scrub on all of the parts. But most people are not going to have access to that kind of equipment. A way around that is to use a small plastic or metal tray and some solvent like gun scrubber. Carburetor cleaner from your local auto parts store also works well to loosen carbon and deposits. Use a nylon brush to scrub down parts and get into all the nooks and crannies. Heavy carbon deposits may require some longer soaking time in carburetor cleaner to break up the deposits.

When cleaning make sure to avoid metal scrapers and tools to remove heavy deposits. If you are not careful you can cause damage to the part, you are trying to clean cleaning.
Inspection process.
Once you have all the parts in the bolt carrier group cleaned up it is now time to get a bright light and a magnifying glass. Several parts in the bolt assembly can fail, causing the rifle to stop completely. The whole purpose of this exercise is too identify a possible issue and stop it before it becomes a failure point.
The extractor
As the name suggests this little part is responsible for extracting the spent shell casing. This part has personally been responsible for interrupting my shooting day several times. There is no magic maintenance schedule on this part either. I have had extractors fail after as little as 600 rounds and as many as 5000 rounds.
Inspecting the Extractor
When inspecting the extractor parts there are several things we are looking for.
- Check the lip that hooks the shell casing for signs of cracks or burrs. Any signs of stress in this area and you want to replace it. When the lip breaks off the spent case will remain in the barrel and will need to be knocked out using a cleaning rod.

- The pivot pin. I have had two of these pins fail, when they do the extractor will move back and forth in the bolt. Sometimes you will get a partial extraction of the spent case.
- Spring and Oring. The spring and Oring provide the pressure on the extractor so that it can grip the spent case. Orings will fail in time due to oil and fatigue so will springs. The purpose of the oring is to add pressure to the extractor so that it will not slip off the shell during extraction. Be careful when replacing orings as not all orings will have the same hardness. Using a softer oring even though it is the same physical size will result in less extractor pressure.

When it comes time to replace a part, I will generally replace the whole assembly, spring and Oring, pivot pin, and extractor as one complete batch. It costs about thirty dollars for all of these parts in a good quality brand

AR 15 Bolt
The bolt is the actual part that will lock into the barrel. The bolt is subject to the pressure of combustion mechanical cycling. It is also exposed to the hot gases from the gas system. The things we need to be checking on the bolt are.
- The locking lugs. These are the parts that interlock with the barrel. We are looking for signs of wear on the lugs or burs starting to appear.

Testing the Ejector
- Ejector pin. This is the pin that is located in the front of the bolt face. The ejector is held in place by a small roll pin. Usually, I will not remove it unless I am going to replace the entire ejector. To check the ejector operation, install an empty shell case under the extractor. The ejector should be holding up one side of the shell casing. Pull the shell against the ejector until it hits the bolt face. Then release it while still holding the bolt. The shell should be thrown out of the bolt. It should also take some force to compress the ejector.

- Gas control rings. Located at the back of the bolt the gas control rings operate like a set of piston rings in an engine. The gas rings are designed to stop combustion gases from moving past them. While still allowing the bolt to slide inside the bolt carrier. The easiest way to test the condition of the gas rings is to lightly oil them and install the bolt into the bolt carrier. Leave the bolt at the extended position and place it bolt face down on the bench. If the bolt carrier slides down under its own weight, then it is time to change the gas rings. When changing gas rings make sure to offset the gaps at 120°

Replace worn parts as required.

Firing Pin
Make sure that the pin is straight and clean. Check the very end of the pin where it strikes the primer for any signs of cracking or deformity. Replace as required.

AR 15 Bolt Carrier
The bolt carrier house the actual bolt and will move back and forth in the upper as well as having the actual bolt move back in forth inside it. Inspect the bolt carrier for wear internally and externally.
- Check the bolt retaining pin and pathway. The bolt pin travels along a machined pathway in the bolt housing. Check for grooving on the pin and signs of burrs on the pathway.
- Check for excessive scoring on the inside of the bolt carrier where the gas rings travel. Heavy scoring can result in gas leakage affecting the cycling of the gun.

- Make sure the gas key is tight. Hold the carrier in one hand and grab the gas key with your other hand. Make sure that you cannot move it. If it moves remove and replace the retaining bolts making sure to use Loctite and correctly staking the bolts to the housing after tightening.

- Firing pin retaining pin. I periodically just replace these to avoid any possible issues. Pins can lose tension and can break from fatigue.

Reassembling the AR 15 Bolt Carrier
With all the parts cleaned and inspected, the bolt carrier can be re-assembled.

- Lubricate the extractor pivot pin and spring with gun oil. Then assemble back into the bolt

- Make sure the gas piston rings move freely. Then correctly position the rings. Lubricate the rings and the bolt carrier bore with gun oil.

- Slide the bolt into the carrier making sure that the extractor is on the gas port side.

- Lubricate the bolt retaining pin. I like to use gun grease where the pin contacts the pathway. Slide the pin into the bolt carrier assembly and rotate it 90°

- Install the firing pin and retaining cotter pin.

- Lubricate the contact points on the bolt exterior with gun oil. Then set bolt assembly to the side.


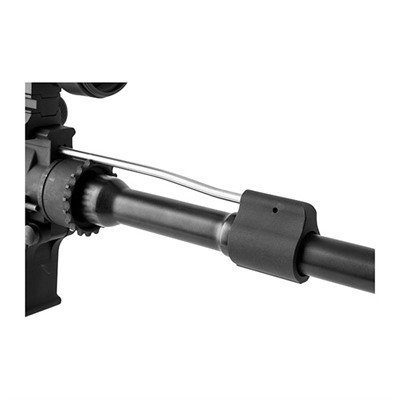
AR 15 Cleaning: The Upper housing Assembly
The upper assembly is going to consist of two distinct systems, the barrel with the gas system and the upper receiver where the bolt runs.

AR 15 Barrel and Gas System
The amount of cleaning required in the barrel and chamber is going to depend on how many rounds have been fired since the last major clean. Barrels are susceptible to copper fouling where the barrel will get coated with copper residue. The copper residue will affect the accuracy and if left in the barrel for long periods will result in corrosion.
How to Clean the Barrel and De-copper
- With the rifle open or the upper removed install, a cleaning rod guide. This helps to keep cleaning solvents out of the upper receiver and chamber.

- Dip a caliber-specific bronze brush in a copper solvent like “Sweets 7.62 Solvent” and push it through the bore without stopping. Then pull it back through in one smooth action.

- Using a “jag” with a clean patch wrapped around it, dip it into the solvent. Scrub the length of the bore back and forth for about a minute.

- Then run a clean patch’s through from the breach to the muzzle, discarding each patch after one pass. Repeat the process until there is no trace of blue seen on the patch.

- Repeat the process if required for heavy fouling until the barrel is clean.

- Lastly using a chamber brush clean the chamber and wipe out with a fresh cleaning patch. You can wrap a fresh patch around a cleaning brush to wipe out the chamber.

The Gas System
The gas system is attached to the barrel. Cleaning of the gas system can be problematic. If you try to use something like a pipe cleaner to clean the gas tube you run the risk of getting the pipe cleaner stuck in the tube. The other issue is that any debris that is in the pipe can end up being pushed back into the gas block area. This can cause a blockage or restriction than can stop the gun from functioning.
The best thing to do with the gas system is to flush it with carburetor cleaner then blow it out with compressed air. Any more than that will require the removal of the gas block and tube. The gas block and barrel orifices can be cleaned and then it is easier to replace the gas tube than clean it.
Upper receiver housing
The upper receiver can become coated in powder, and copper debris from the gas system. The best way I have found the best way to clean this is to submerge it parts washer fluid and scrub it out with a nylon parts washing. Or if not using a parts washer use a small tub and solvent to submerge the upper in and scrub it clean.

Make sure that if you are using anything other than fixed iron sights that you remove any scopes or red dot sights. Mark the rail with a small sharpie mark to help with re-attachment. Also, remove the charging handle for cleaning
Inspection of Upper and Barrel assembly
The upper assembly and barrel with the gas system are very resilient. The inspection of this system is going to be pretty straight forward.
- Upper receiver. Look for signs of excessive wear where the bolt carrier assembly rides. Perform a general inspection over the entire piece for obvious signs of cracks or wear.

- Inspect the barrel visually. Check the rifling for obvious signs of wear. Also, check barrel locking lugs for signs of excessive wear. Most barrel wear will be evident on the range with poor accuracy being a result of wear.
- Check the Gas system and look for signs of leakage around the gas block and gas tube.

Re-Assembling the Upper After Cleaning
Layout all the cleaned upperparts. If storing the rifle. You should run a clean patch soaked in oil thru the barrel. Make sure to clean the oil out before use. The oil will help prevent corrosion while not in use.
- Wipe down the cleaned charging handle lightly with oil and install it into the housing.
- Reinstall any removed handguards or barrel shrouds

- Lightly lubricate the upper receiver where the bolt carrier will travel with gun oil and then reinstall the completed “BCG”, (Bolt Carrier Group), back into the upper. The bolt should slide easily through the housing and lock into the barrel without much effort.

- Re-attached any removed optics or sighting systems and torque screws to 65 In/Lb. Loose or incorrectly attached sights can be one of the biggest inaccuracy causes.

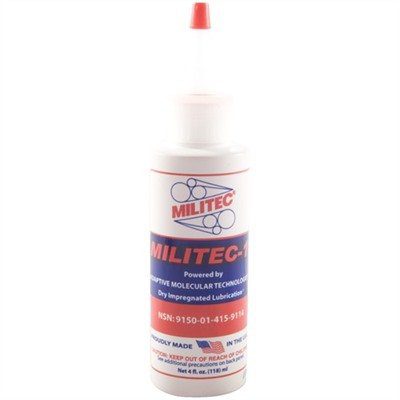
This is a great synthetic gun oil that we have used for the last 25 years
AR 15 cleaning: The lower assembly
The lower assembly of the AR 15 is going to contain the trigger mechanism, buffer, and recoil spring, as well as the locking pins and magazine release. All of these items will need to be cleaned, inspected, and lubricated.
Buffer and recoil spring
- Remove the buffer and spring assembly by pushing the small detent spring at the back of the rifle.

- Wipe down the spring to clean it and lightly oil to prevent corrosion.
- Clean the buffer by wiping down with a clean cloth.
There is not much to inspect on the buffer and spring assembly. The only part that needs to be looked at is the nylon piece on the end of the buffer. Make sure that it is not cracking or beginning to break down. To repair replace the buffer.

Fire control group or trigger assembly
The trigger assembly will accumulate a lot of debris. Both from firing and environmental contaminants. Powder residue and debris can cause heavy trigger pulls as well as interfering with the hammer cocking. On a major clean I will always dis-assemble the complete fire control group to clean it and properly inspect it. I have found that just trying to wash out the area without dis-assembly to be somewhat ineffective for cleaning and lubricating.
Dis-Assembling the Trigger Group
Important tip: do not let the hammer fire without the upper in place. This can cause damage to the lower housing. Make sure that you support the hammer with your hand and let it come forward slowly.
- To begin disassembly, make sure that the hammer is not cocked. If it is, release it by pulling the trigger and supporting the hammer as it comes forward.

- Remove the hammer pin. Using a small punch push the hammer pin through the housing while holding the hammer down. There will be some spring pressure on the hammer. With the retaining pin out remove the hammer and spring

- Push the trigger retaining pin out using a small punch. Carefully lift out the trigger. On some triggers, the safety can interfere with the trigger removal. If this is the case remove the pistol grip and withdraw the safety spring and detent. Then remove the safety lever from the lower receiver.

- With the trigger removed separate the trigger from the secondary sear, being careful not to lose the small spring.

Clean all the small pieces in a small plastic tray so as not to lose anything. Wipe all parts off using a cleaning cloth. With all the trigger parts out of the lower housing now is a good time to wash out the trigger cavity.
Inspection of the trigger components
With everything clean, it is time to inspect for wear.
- Inspect the hammer pin for wear. Make sure that the hammer cannot twist on the pin.
- Check hammer spring for signs of wear. The hammer spring does most of the heavy lifting in the trigger control group.
- Inspect the primary and secondary sear areas on both the hammer and the trigger sear. These parts of the trigger assembly are exposed to the most amount of wear. A worn trigger sear can result in accidental discharges when the bolt slams forward. This is known as slam firing and can happen when loading the rifle. When the secondary sear wears it can result in the rifle firing multiple rounds on a single trigger pull.
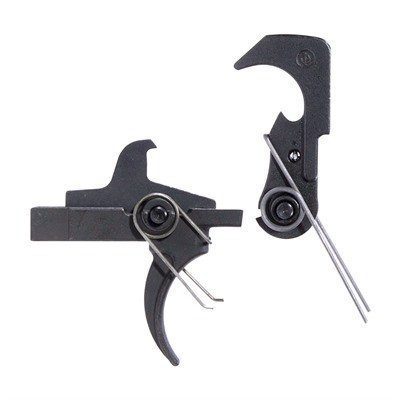
Generally, trigger groups are good for a lot of rounds through the gun. The only firearms where I have experienced trigger malfunctions are guns that have had very high round counts through them. When it comes to replacing worn parts it is better to replace the entire trigger assembly. Basic military triggers are inexpensive and easy to locate. Or update to a better precision trigger assembly.
Drop-in Trigger assemblies
When it comes to drop-in triggers and cleaning you have to follow the manufacturer’s instructions. To remove a drop-in trigger assembly, remove the two pins, and lift the entire assembly out. Do not disassemble these types of triggers. Clean using solvent or carburetor cleaner and blow out with compressed air. Make sure to follow the manufacturer’s recommendation on lubrication. Some triggers like the Timney brand triggers specify no lubrication is to be used on their trigger assemblies.


AR 15 Cleaning the Lower housing Assembly
You have already washed out the trigger cavity in the previous step. Now is the time before beginning re-assembly to inspect and lubricate the takedown pins, hold-open lever, and magazine release.
- Inspect the bolt hold-open lever for damage or signs of bending. To check its operation, install and empty magazine and make sure that the lever lifts all the way. Releasing the magazine will cause the lever to drop.

- Check the magazine release catch. The catch should move freely and fully return without sticking. If the rifle is operated in a dusty environment the magazine catch should be removed to blow out any debris. Do not apply any lube when re-installing. Oil in this area will only attract dirt and debris.

- Takedown pins. Check that both the front and rear pins are secure in the bores. Close the pins and make sure that the detents hold the pins in place. No lubrication is required on these pins as it will only attract debris.

Re-Assembling the Lower Assembly
With all internal parts cleaned and inspected it is time to reassemble.
- Install the magazine catch and bolt catch if removed.
- Install the trigger with safety into the lower housing. Make sure the secondary sear spring is correctly placed if using a military trigger and then slide the pivot pin into place.

- Make sure that the safety moves freely before installing the detent and spring. Make sure to lubricate the detent with gun grease.

- Install the pistol grip being careful not to kink the detent spring and tight the screw to 25 In/Lb

- Lubricate the hammer pivot pin with gun grease. Install the hammer with spring and slide in the hammer pin.

- With the Fire Control Group installed lightly lubricate pivot points using gun oil. Except if using a precision trigger, in which case check with the manufacturer before lubing.
- Cock the hammer and check that it fires. DO NOT LET THE HAMMER STRIKE THE HOUSING. Make sure you support the hammer with your hand.
- Check that the safety operates correctly and that the trigger will not release with the safety on.
- Make sure that the secondary sear system works correctly. To check the secondary sear system, hold your finger on the trigger, and pull the hammer back. The secondary sear should hold the hammer. Release the trigger and the hammer should move to the primary sear and be ready to fire.
- Reinstall the buffer and spring into the tube.

AR 15 Cleaning: Final Assembly
Now both the upper and lower assemblies are complete it is time to bring the two pieces back together. Place the upper onto the lower and snap-in both of the takedown pins. Cycle the bolt without a magazine installed and make sure that the bolt moves freely and closes completely. Dry fire the rifle and make sure the trigger feels normal. Install an empty magazine and pull the bolt back and make sure that the bolt catch holds the bolt back. Hit the bolt catch release the bolt should close completely.
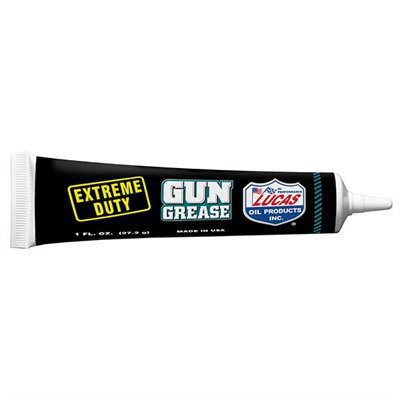
Gun Grease is used in those areas of the firearm that are under high mechanical stress
Everything should be working smoothly, and your rifle is now ready to either go straight back out in service or be ready for storage in the safe.
Magazine service
Even though the rifle has been cleaned and is ready to go there is still one last piece to address, the magazine or magazines as the case may be. It is not uncommon for magazines to be dropped in the dirt while reloading. Magazines will also have chamber gases, powder residue, and debris from the gun. So, the magazines should be cleaned at the same time as the rifle.
- Tip the magazine upside down and press and hold the button catch while sliding off the bottom plate. Be careful it is under spring pressure.

- Remove the spring and follower from the magazine.

- Wipe out the inside of the magazine and also wipe down the follower and spring.
- Do not oil any of these parts. The oil will just attract debris that can cause the magazine to bind up and not feed. Just make sure all parts are clean and dry.

- Re-install the follower and spring back into the magazine.
- Compress the magazine spring and reinstall the floor plate.

- Depress the magazine follower. Verify that it returns to the fully up position without sticking or binding.
- Repeat for all magazines

Some GI type magazines have a stop built into the magazine. The stop is there to prevent the follower from being removed. When cleaning this type of magazine you will have to just wipe out what you can.
AR 15 Cleaning Supplies and Tools
The tools required to perform this job are not expensive nor are they exclusive to the AR 15 Rifle. The odds are if you already own other firearms you will most likely already own the necessary cleaning components.
For those of you that are new to the shooting realm, I have listed all the items that I used in this article below. I have also provided a link to our resources page where you can view all of our affiliate links to the actual items used in this article.
- Cleaning Rod
- Sweets 7.62″ solvent. make sure to use in a well-ventilated area
- Gun Cleaner solvent
- Carburetor Cleaner works well for heavy carbon deposits
Comes with barrel bronze brushes and chamber brushes, small pick and nylon brush all contained in a small case

If you have questions on this please use the comments section. If you feel that I have left out something, then please let me know.
Be Safe and shoot often.
Great post. Keep posting such kind of information on your site.
Thank you to my father who shared with me on the topic of this blog, this blog is actually amazing.
Just wish to say your article is as amazing.
The clearness in your post is just cool and I can assume you’re an expert on this subject.
I really like what you guys tend to be up too. Keep up the great works guys
I think the subject matter here is real superb,
thank you for your efforts.
wonderful points altogether, you just gained a brand new reader.
Great post
So much excellent info on here :D.
I love what you guys are up too. Such good information on cleaning and servicing my rifle.
Keep up the superb works guys
Some truly nice and useful info…
Wow! This is the most useful topic I have come across. I have certainly just learned a lot about cleaning my AR 15 rifle.
thanks again for all the information
Excellent read, I just passed this onto a colleague who was really struggling to maintain his rifle.