
- Cleaning colt 1911 Pistols
- Concealed Carry and cleaning colt 1911 pistols
- Field stripping and cleaning colt 1911 pistols
- Re-assembly after field-stripping and cleaning Colt 1911 pistols
- When is a field strip enough for cleaning Colt 1911 pistols?
- Cleaning Colt 1911 pistol: A complete teardown
- How to perform a complete teardown on the 1911 pistol
- Slide removal and break down
- Firing pin
- Extractor removal and inspection
- Cleaning Colt 1911 slides with all internal parts removed.
- 1911 Slide re-assembly
- Cleaning Colt 1911 Frame: Complete disassembly
- Grip Removal
- Mainspring removal
- Grip safety and safety lever removal
- Removing the hammer and trigger sears
- 1911 trigger and magazine catch
- Cleaning and inspection of the Colt 1911 frame and parts
- Reassembling after cleaning Colt 1911 pistols
- Final assembly and function checking of the Colt 1911 pistol
- Cleaning Colt 1911 magazines
- Cleaning Colt 1911 pistol schedule
Cleaning colt 1911 Pistols
Cleaning your Colt 1911 pistol is an important part of keeping your pistol in good working order. There are often questions raised as to how often you should clean your pistol. As well as how thorough the cleaning process needs to be. In this article, I will break down the different types of cleaning, field stripping, and major cleaning. As well as place a schedule to how often you should be doing this important job.

Any time a pistol is fired powder debris and copper deposits are left in the barrel and the action. Over time these contaminants can build up in the pistol. At some point, if not properly cleaned the pistol can malfunction causing it not to load or fire. For someone that carries the pistol as their “EDC”, (Everyday Carry), this can result in a failure or stoppage when the pistol is needed most.
Concealed Carry and cleaning colt 1911 pistols
When a pistol is carried concealed it is also exposed to other contaminants. Depending on the environment you live in, dust and dirt can enter the slide area and hammer area. One of the big problems I notice is that lint and clothing fibers will build up in the slide and hammer areas. Over time I have found that these fibers will suck up the oil on the slide causing it to dry out. Though this has not directly resulted in a failure to fire I have had to use my support hand to strike the back of the slide to get the pistol into battery.

When carrying a pistol as a primary means of self-defense it needs to be ready to go into action at any time and work without issue. This means that the pistol should be serviced even if it has not been fired. It is something I find that a lot of people will tend to overlook because the pistol has not been fired they think that it does not need to be cleaned.
How to choose the best 1911 pistol for Every day Carry
Field stripping and cleaning colt 1911 pistols
The first method of cleaning is the field strip and clean. This is a basic level of maintenance/cleaning and is Ok for a quick clean. Just so long as the pistol is not that dirty. One of the benefits of the 1911 design of pistol is that it is designed to be disassembled without any tools for cleaning. Even on a major clean, the only tool needed is a small flat blade screwdriver to remove the grips and the magazine catch.
Cleaning Colt 1911 pistols: Field stripping
The first part of cleaning is always to unload the gun. Remove the magazine first and pull the slide back to eject the chambered round. Safety is always paramount. It is also a good idea to remove all ammunition from the cleaning area. Just to make sure a round does not end up in the chamber when it should not.
Removing the slide
The slide is retained to the pistol frame by the slide lock pin, which also doubles as the takedown pin. Depending on the model of 1911 the removal process may be slightly different. On a full-size government 1911 or Commander style pistol, rotate the front barrel bushing by pushing the recoil spring cap down and turning the bushing to the left. This allows the recoil spring to expand out releasing the pressure on the slide. The slide can then be moved back and the takedown pin removed.

On Compact models like the Colt defender and some other 1911 clones, the recoil spring has to be removed with the slide off. This means that you will have to hold the slide back against the recoil spring force to remove the takedown pin.

Removing the barrel
With the slide off, and the recoil spring removed, the barrel can be removed. To remove the barrel on the Government model and Commander models rotate the barrel bushing until the lug aligns with the slide spring hole, then pull it forward and out. To remove the barrel, slide the barrel out the front of the slide.

The colt defender models do not use a barrel bushing and the barrel can just be slid out the front of the slide. Once the recoil spring has been removed.
Cleaning Colt 1911 after field stripping
This level of disassembly is all that is required for a field strip and clean. The next steps are to clean the barrel, wipe out the slide, and wipe down the frame.
Cleaning the barrel
To clean the barrel, you will first use a

After using the
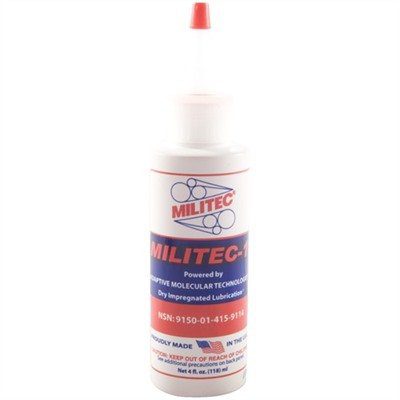
Sweets 7.62 Bore Solvent is the most effective solvent I have ever used. I have been using this solvent for over 35 years. Just make sure to use it in a well-ventilated space...

Once the barrel has been scrubbed out with the solvent it’s time to dry it out. Using a clean bore patch push one through from the chamber side. Discard the patch at the muzzle. Continue using clean patches until the patch comes out clean at the muzzle.

Finally, wrap a clean swab around the

Wiping down the slide of the 1911 pistol
Wipe the slide down with a lint-free towel. If there are large deposits of powder residue in the slide, I would use a spray-on solvent to break up the debris before wiping the area.
Make sure that the slide rails are clean and free of powder residue. Wipe out the firing pin area at the back of the slide. Using a small awl, you can check that the firing pin moves freely by pushing it down and letting it spring back.
Wipe down all the components of the slide including the barrel bushing, (if used), and recoil spring(s). After wiping everything down lightly oil the slide to prevent rust.
Cleaning Colt 1911 Frames
Wiping down the frame is going to be similar to wiping out the slide. Using a

Re-assembly after field-stripping and cleaning Colt 1911 pistols
Now that everything is clean it is time to reassemble. Install the barrel into the slide by inserting it into the front of the slide and install the barrel bushing, (if required). Rotate the barrel bushing to the side, locking it in place, and install the recoil spring and guide. Leave the spring sticking out the front of the slide for now.

On models that do not use a barrel bushing. And the recoil spring is contained by the slide. Install the spring and guide assembly into the slide.
Lubricating the slide rails
Place a couple of drops of oil on the back of the slide in the rails. Also, place a couple of drops of oil on the frame rails. Then install the slide onto the frame. Make sure that the frame is held with the magazine well facing down as otherwise, the firing pin lock lever can prevent the slide from being installed.

Pull the slide back far enough to install the takedown pin. Make sure the barrel lug is facing down and that the takedown pin goes through the barrel lug. This can be an issue with smaller guns where the recoil spring is under spring pressure when installing.
Finally, install the recoil spring plug and rotate the barrel lug to complete the assembly on full-size and mid-size pistol models.
This is a great synthetic gun oil that we have used for the last 25 years
Make sure to test the pistol after assembly by cycling the slide and working the trigger. The slide should be smooth and cycle easily. The trigger should be smooth, and the hammer should drop immediately with the trigger pull. The hammer should lock back every time the slide cycles. Make sure that the safety lever engages and disengages smoothly.
When is a field strip enough for cleaning Colt 1911 pistols?
Field stripping and cleaning is a good way to maintain an already clean pistol that sees little use. It is also good to perform a felid strip and clean on your “EDC” even if it has not been fired about every three months. This way any lint or debris can be cleared from the pistol. Performing this regular maintenance will keep the pistol working.
When it comes to assigning round count for performing a field strip and clean. It is only really good up to a few hundred rounds. This is because powder debris and other contaminants will get deeper into the pistols working parts with the more rounds that are fired. When this happens a deeper and more though clean should be performed.
Cleaning Colt 1911 pistol: A complete teardown
Once a pistol has been in service for some time and has seen a large number of rounds fired through the pistol it is a good idea to do a complete teardown and clean including a full parts inspection. When you carry a 1911 pistol as your ‘EDC” you should be shooting the pistol regularly. It also means that the pistol needs to be ready to go without issue at a moment’s notice.

Any mechanical device can suffer from a parts failure at any time. Even if it is somewhat new. So, it is always a good idea to routinely break down the pistol to check for wear and damage or parts that might be close to failing.
How to perform a complete teardown on the 1911 pistol
The first part of the teardown is going to be the same as the field strip. Starting with unloading the pistol and removing the ammunition from the area.
Slide removal and break down
Remove the slide and barrel assembly as mentioned above. Cleaning the barrel is going to be the same process as the field strip method. The big difference is going to be that we need to disassemble the slide further to remove the firing pin and extractor.

Firing pin
On the back of the slide, there is a small plate that retains the firing pin. To remove the firing pin, we need to depress the pin and remove the plate out of the slide. Most modern 1911 pistols will use a firing pin blocking pin. This safety feature prevents the firing pin from going forward without the trigger being pulled. It will also help us remove the firing pin.

With the slide upside on the bench push the firing pin forward in the slide while holding the blocking pin in using your finger or another awl. While still holding the firing pin in release the blocking pin. Then release the firing pin. The blocking pin will hold the firing pin down allowing the rear retaining plate to be slid out of the slide.

Now that the retaining plate is off, cover the back of the slide with a shop towel to catch the firing pin and push the blocking pin into the slide. The firing pin will pop out the back of the slide. Be careful as it is under spring pressure. Once the firing pin is out the safety block pin and spring can also be removed for cleaning.

To clean simply wipe down the firing pin and inspect each end of the pin for signs of wear or damage.
Extractor removal and inspection
The extractor used on the Colt 1911 models is easily removed once the firing pin retaining plate has been removed. Simply slide out the extractor using a small awl or screwdriver. Once the extractor is out wipe it down and carefully inspect the lip that grips the casing. This is where most extractor failures occur. Replace the extractor if there are any signs of wear or damage.

Some clone models of the 1911 pistol use an external extractor. Models like the Sig 1911 have the extractor on the outside of the frame. To remove an external extractor there is a pivot pin in the frame. Drive the pin out to remove the extractor. I would inspect the extractor as best as I could while still attached to the frame. And only remove it if I suspect there is an issue with it.

Cleaning Colt 1911 slides with all internal parts removed.
With all the parts removed from the slide, it can be washed thoroughly. Using a solvent tank or spray cleaners and small brushes to clean down the firing pin bore, and extractor bore. Then flush with fresh solvent.

Scrub the bolt face where the slide surface contacts the shell casing. The extractor bore is an area where carbon and debris will tend to build up over time. So, make sure that it is completely cleaned out.
1911 Slide re-assembly
Once everything has been cleaned and inspected it time to re-assemble the slide. Install the extractor into the slide first.

Followed by the safety blocking pin and firing pin. Depress the firing pin and safety blocking pin in the same way that you did during disassembly. Be careful not to slip off the back of the firing pin as it can end up flying across the room. Retain the firing pin by using the safety blocking pin and then install the backplate. Then release the firing pin by pressing the safety block and letting the firing pin snap back against the retaining plate.

Assemble the cleaned barrel and recoil spring back into the slide and sit it off to the side.
Cleaning Colt 1911 Frame: Complete disassembly
Disassembling the frame may seem like a daunting task, but really it is not. The only tools you will need is a good quality flat blade screwdriver and a small awl or pin punch to help push out pins and pivots.
Grip Removal
Removing and installing the grips is a very simple job. Most of the time the grips will be attached to the frame using slotted head screws. Some pistols may use different heads on the screws like Allen or Torx head screws.

To take the grips off simply remove the screws and the grips will lift off the frame. To re-assemble, install the grips, and replace and tighten the screws.
Mainspring removal
The first place to start is removing the mainspring assembly. Make sure that the hammer is down before trying to remove the retaining pin. Using a small awl or punch push the pin out at the bottom of the grip. The pin may be hard to move at first, especially if it has not been out in some time.

With the pin removed the mainspring assembly will slide off the frame. There will be some slight spring pressure on the mainspring assembly. This will not cause the part to fly across the room though. The actual spring will remain encapsulated in its housing.

The mainspring housing will also hold the leaf spring for the grip safety and trigger. It is common for this to fall out once the mainspring has been removed. Do not worry if it does, I will show you how to install it later in this article.

Grip safety and safety lever removal
The grip safety pivots on the same pin as the manual safety. The safety lever uses a small detent that also works on the slide lock lever to locate it. To remove the safety lever and grip safety move the lever to the middle of its travel range then lift up on the lever. Remember to catch the detent spring when lifting the lever. The hammer will need to be in the cocked position to remove the safety.

Once the safety lever is out you can go ahead and pull out the detent spring and followers. There will be one follower at each end and a common spring in the middle.
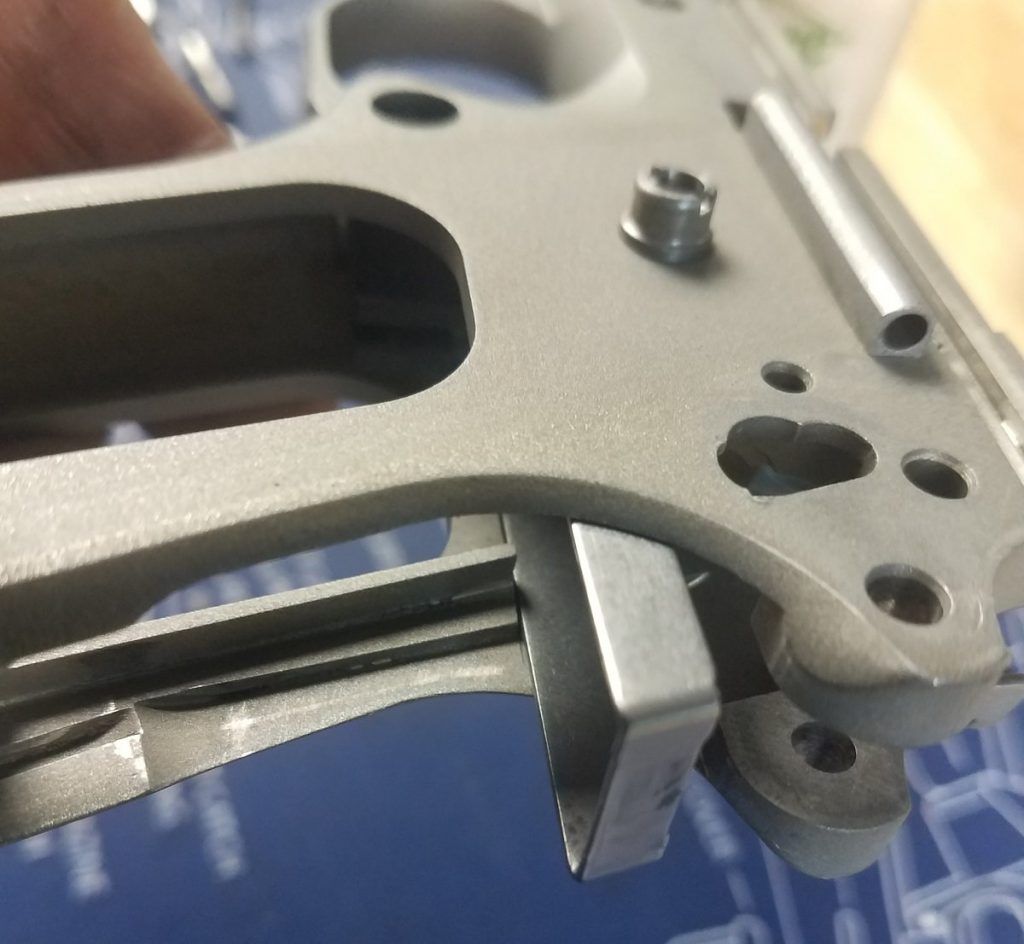
Removing the hammer and trigger sears
The hammer and trigger sears are retained by two separate pins. The pins are directional. To remove them press them from the right side to the left side of the frame. Starting with the hammer pivot, push the pin out with a small punch/awl, and then slide the hammer and safety disconnect lever out.

Next slide out the trigger sear pivot pin. There will be three parts that come out when the pin comes out. The parts will be the hammer sear, disconnector, and safety plunger disconnect transfer lever. Lay the parts out on the table along with the pin.

1911 trigger and magazine catch
There will be two items left in the frame, the trigger and magazine catch. The trigger is retained by the magazine catch. To remove the magazine release, push the magazine release button and hold it against the frame. Then using a small screwdriver rotate the screw on the backside of the catch counterclockwise 90°. This will allow the catch to slide out of the frame.

With the magazine, catch removed the trigger will slide out the back of the frame.
Cleaning and inspection of the Colt 1911 frame and parts
Now that the frame is completely bare, wash it using a solvent tank or by using automotive cleaners like brake cleaner. You want to make sure that you concentrate on those areas that are normally not accessible when the pistol is fully assembled.
These are areas like the trigger groove and hammer pocket. When it comes down to the individual small parts, these will be best cleaned using a small tub and automotive brake cleaner. After cleaning the individual parts wipe them down using a lint-free

Inspection process
The main wearing parts in the frame are going to the hammer and trigger sears. The sears have metal on metal contact under load. In time they will wear out. Though it will take a lot of rounds for this happen. The other things to watch for are grooving on the pivot pins and cracking on the leaf spring.
When the trigger sear and or hammer have significant wear, it can result in unwanted discharges known as slam firing. This happens when the sear and or hammer wears and then when the slide goes into battery, the sudden jolt causes the gun to fire. On a gun with the firing pin block installed the pistol will not discharge. However, the hammer will be down.

On earlier models without a firing pin block, the pistol will discharge when the hammer drops. This can result in serious injury or death. If ever you experience an unwanted hammer drop it is best to change both the hammer and trigger sear parts immediately. Or stop using the gun and take it to a competent gunsmith.
Reassembling after cleaning Colt 1911 pistols
Reassembly is the reverse of the teardown process. There are a few points to watch when reassembling the pistol.
Trigger and magazine catch
Lightly lube the contact points on the trigger bar and slide it back into the frame first. Install the magazine catch and rotate the locking pin 90° clockwise to secure it.
Installing the hammer and trigger sear including disconnect and safety lever
This part can be a little complicated. Start by assembling the trigger sear and disconnector. With the pistol frame pointed down to lay the sear and disconnect pin in, sitting them on the trigger bar. Next, start the pivot pin from the left side of the frame but do not push it all the way in.

Before pushing the pivot pin all the way in the safety pin disconnect relay lever will need to be installed. It fits just beside the trigger sear and pivots up with the trigger pull to push the firing pin safety lever. I use a small awl to locate the lever correctly from the right side then push the pivot pin in from the left.
Now re-install the hammer and its pivot pin in the down position. Do not forget to install the safety plunger disconnect lever next to the hammer. The lever will pivot on the hammer pivot pin and transfer the movement from the trigger lever to the blocking pin in the slide.

Make sure to lightly oil the pivot pin and hammer where they rotate against each other. Let the hammer tail lay down in the frame of the pistol for now.
Installing the grip safety and manual safety lever
Before installing the safeties make sure to install the detent plungers and spring for the slide lock and safety lever into the frame. Next, slide the grip safety into the frame and line up the holes. Install the manual safety lever/pivot into the frame.

The hammer will need to be back to be able to complete the manual safety install. You will also need to hold the detent plunger back using a small screwdriver. Then slide the lever fully home.
Mainspring and leaf spring installation
The leaf spring acts as a spring for the trigger, the disconnector, and the grip safety. It sits in a small slot in the frame and held in place by the mainspring housing. To install it lay it into the groove on the frame. Then slide the mainspring housing into the frame just enough to hold the leaf spring.

With everything held in place align the hammer tailpiece with the mainspring, close the grip safety, and slide the mainspring housing up. The hammer will need to be in the down position to install the retaining pin.

With the pin installed make sure that the hammer functions normally and that the safety can be engaged and disengaged. With everything working correctly re-install the grips.
Final assembly and function checking of the Colt 1911 pistol
All that is left is to re-install the completed slide assembly. Lubricate the slide rails on both the frame and the slide and install it. Make sure to function check all aspects of the pistol. Install an empty magazine and make sure that the slide will lock back. Check the operation of the manual safety and grip safety. Confirm the trigger disconnect functions correctly by pulling and holding the trigger while working the slide. Then release the trigger and it should switch to the main trigger sear.
With everything working the pistol is almost ready to go back into service.
Cleaning Colt 1911 magazines
The last thing on our major cleaning list is the magazines. Magazines can often be dropped in the dirt while

A dirty magazine can result in a feed issue that stops the gun.
Disassembling the Colt 1911 magazine
To disassemble the magazine, push the follower about halfway down and then insert an awl through one of the holes. This will hold the spring down allowing you to remove the follower. Shake the follower down to the top of the magazine and pivot it out. Now place a shop towel over the top of the magazine and pull out the awl to release the spring.

With the spring and follower removed use a swab or a lint-free towel to wipe out the magazine. If the magazine is really dirty, then wash it out using solvent and completely dry it with compressed air. All parts including the magazine body should be clean and dry and free from oil.
How to re-assemble the Colt 1911 magazine
Install the cleaned and dry magazine spring into the magazine body. Making sure that the top of the spring is facing up. The top of the spring will have a small loop that will locate on the follower.

Hook the follower onto the spring. Then fold the spring until the follower is at 90° to the magazine body. Compress the spring into the magazine while feeding and rotating the follower. The follower should slide under the feed lips and pop into place.

Repeat for all your magazines. Make sure not to use any oil on the magazines. Oil can attract dust, dirt, and lint that can cause a magazine to not feed correctly.
Cleaning Colt 1911 pistol schedule
All firearms are mechanical devices, and all mechanical devices need regular maintenance. If you look after your sidearm it will look after you. I clean my EDC pistol after every use. Then every 6 months, I perform the major break down and clean regardless of round count. It may seem like a daunting task but a major clean will usually only take me about 20 to 25 minutes. The more you do the easier it will become.
Stay safe and shoot often.