What’s the point of landing the perfect shot if you don’t have it on video?
While it is typically enough to have someone document the shot, it doesn’t capture images from the shooter’s point of view.
Preparing a separate tripod for a camera will also be inadequate, especially if you want to capture target hits from long-range.
To do this, you will have to learn how to attach a camera to a rifle scope.
Doing so makes it possible to not only view but also record what the scope can see.
Why Attach a Camera to a Rifle Scope?
Recording your shooting sessions from your perspective as the shooter is essential if you plan to do an online vlog about the sport.
With a camera on the rifle scope, you can collect instruction material and introduce new shooters to the hobby.
If you’re not into vlogging, first-person documentation of your shooting practice can also help you improve your skill.
For instance, a careful analysis of the recordings and images allows you to understand why you missed a shot.
You can then use the information to plan ahead and avoid repeating the same mistakes the next time around.
While having a camera attached to a scope is pretty much just an add-on for many shooters, some will have problems with parallax and eye relief.
The reason? Staring down a live image of what the scope sees through the camera removes the necessity of focusing with one’s own eyes.
However, using a camera to focus on a target will not help you improve your use of scopes or your shooting skills.
It is only good practice for zeroing down on your sights or for documentation of shooting sessions.
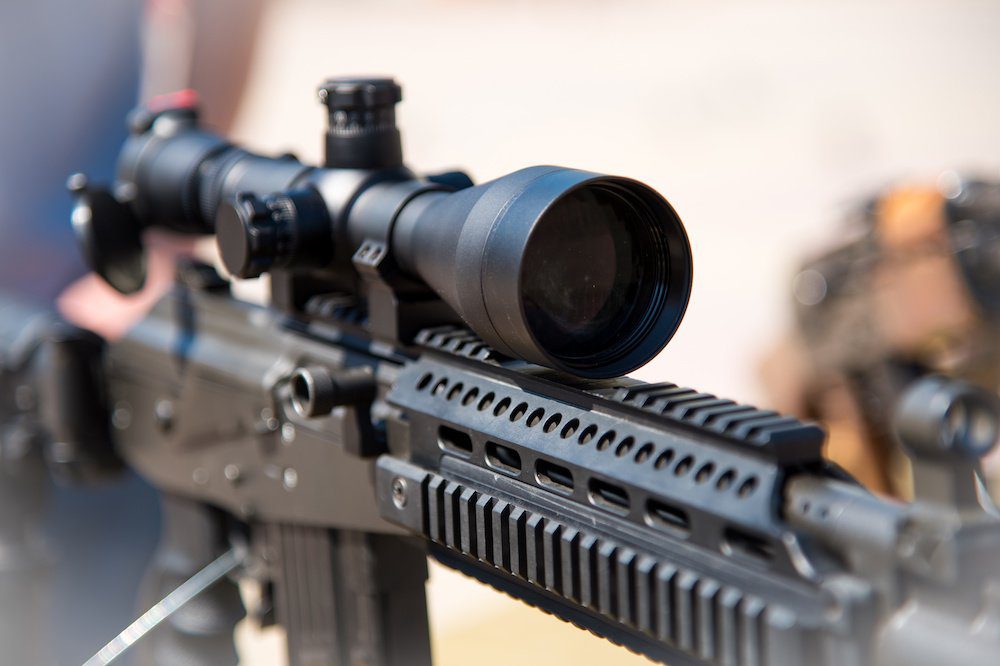
How To Attach a Camera to a Rifle Scope
Learning how to attach a camera to a rifle scope can be tricky at first, especially since there are so many available mounts on the market.
There is no shortage of rifle scopes, and you’ll also find a vast selection of cameras you can use.
With all the different scopes and cameras to pair, there aren’t really any standards for choosing the right ones.
The following steps will help you breeze through the process of creating a setup that incorporates a camera whenever you need it.
Step 1: Choose your camera wisely.
Photo and video cameras come in so many forms. Hence, it is up to you to select the best one for your shooting purposes.
Specialized Scope Cams
You will find many products that fall under the specialized scope cameras category.
If you choose to get a scope camera, you won’t have to think about mounting hardware because most of them come with one.
Just be sure that the complementary mounts fit your scope and don’t interfere with the scope mounts if they attach to your gun rail.
The advantages of scope cams include remote synchronization with your mobile devices and robust weatherproofing solutions.

Digital Cameras
Many digital sporting cameras, such as the GoPro, come with mounts that let you set them up whichever way you like.
As such, choosing any of them as a scope cam will only require an adapter to mount them to the correct position on the scope.
Sporting cameras are also typically weatherproof.
However, some won’t have the syncing capabilities that good-quality specialized scope cams have.
With digital cameras, you will have to process your media apart from your shooting sessions.
Smartphones
Your budget will always be a determining factor while you try to complete your shooting hardware.
After all, not many cameras come with a cheap price tag.
When it comes to shooting or hunting, you are always better off spending your hard-earned cash on things that really matter for your hobby.
Fortunately, the smartphones of today pretty much have excellent quality cameras.
Do you plan to use your phone as your primary shooting camera?
Doing so means you will not only cut back on costs but also make your media easily available online.
Step 2: Get the correct mounting hardware.
Most of the camera mounts you will find in the market are called adapters.
The reason behind this name is that they adapt the scope sight picture into the lens of the camera.
Purchase Specialized Mounts
There is a plethora of scope adapters for cameras in the market.
The one you choose should perfectly affix to your camera’s lens against the scope eyepiece.
What’s more, it should attach securely to your scope or your gun.
Most camera mounts and adapters come with adjustable grips that hold your camera in place.
Just be sure to have one that suits your needs.
Do-It-Yourself Hardware
Got a knack for doing things yourself?
If so, you can make the experience more satisfying by fabricating your own camera mounts.
You can avoid purchasing expensive camera adapters if you choose this path.
The internet is an open source for plenty of DIY projects for hunting and shooting accessories.
You will surely come across a handful of videos showing how to create a camera mount for your rifle scope.
Step 3: Calibrate Your Gear
As soon as you have a camera and a matching mount or adapter, the hard part is over.
You can now start calibrating your gear with your camera and vice versa.
Zero down on your sights by looking at the sight picture through your camera and adjust the mounts, knobs, and settings as you would with a scope.
Adjusting your sights through the camera can be a bit different and confusing the first time you set it up.
However, you will find that familiarizing yourself with your gun and scope firsthand will eventually pay off in the long run.
Conclusion
To attach a camera to a rifle scope, you will need a compatible mount.
Of course, the mount should fit not only your camera but also your rifle scope.
Cameras and smartphones come in different dimensions, and so does the tube diameter of rifle scopes.
Some mounts and adapters feature a one-size-fits-all mechanism to fit almost any camera or smartphone with any scope diameter.
Because of the varying features, some mounting sets are affordable. Others can be more expensive than some budget rifle scopes.
If you like to do some tinkering, a little DIY can be very satisfying once you successfully fabricate your own rifle scope camera mounts.