
If you want to personalize your shooting hardware, you can start by learning how to paint a rifle scope.
More than anything, it is an excellent way to make your piece look unique.
Even better, it is a more affordable approach than getting a customized paint job straight from the factory.
How to Paint a Rifle Scope
Painting your rifle scope is a fun activity, giving you the option to create your own designs from scratch.
You can do permanent paint jobs for a long-lasting treatment, and there are solutions you can use for a temporary finish.
For this project, we will be discussing the cheapest and simplest procedure, which involves the use of store-bought spray paint.
Things You’ll Need
Since we are talking about spray paints, which release volatile organic compounds (VOCs) as fumes, you will need a well-ventilated workspace.
Choose an open-air environment, or increase the airflow within an enclosed space.
Additionally, you will want to see how your piece will look in daylight, so work in a well-lit area.
Here are the items you will need to purchase or prepare:
1. Your Workpiece
Learning how to paint a rifle scope is the same as trying to paint any other related hardware, such as your rifle and its other accessories.
It is easier to start with a smaller workpiece such as your scope.
Afterward, you can also work on other components to match the paint job.
2. Spray Paint
Start with a simple sketch using different colors to decide which color spray paints you need.
If you’re not into sketching, you might want to browse online for images showing designs you might want to copy.
Most of the time, a camouflaged paint job is the go-to option for personalizing guns and other related hardware.
Earth green tones, tans, and browns are perfect for woodland applications, while grays and off-whites are best for the tundra.
However, having a plain-colored paint job is also just fine. Just remember to choose matte or flat paints and not glossy ones.
3. Masking Tape
You will need masking tape to cover up all the parts you wouldn’t want the paint to touch.
These parts include the lenses, mechanical adjustment knobs, calibrations, and serial numbers.
Choose a masking tape that is fairly easy to remove and doesn’t leave any sticky residues.
4. Scrap Paper
You wouldn’t want to waste masking tape to cover large areas.
In this case, scrap paper trimmings are also perfect for masking.
Use scrap paper and secure its edges onto the workpiece with masking tape.
5. Craft Knife
A craft or Exacto knife can come in handy for cutting small, precise shapes from your masking material.
Keep in mind that a blade can damage the surface of your scope, so use it off the scope carefully and sparingly.

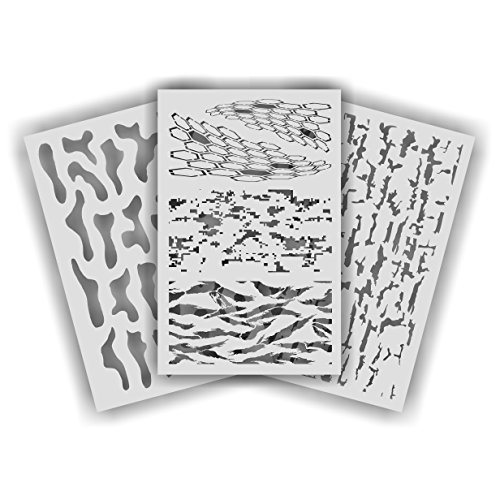
6. Templates and Patterns
Depending on how creative or precise your design is, the templates and patterns you can use include anything under the sun.
Some examples of the perfect camouflage templates are branches, twigs, and leaves.
You can also use netting, feathers, and different types of brushes.
7. Protective Gear
It would be nice to have some painting gloves, a face mask, and some goggles for a simple spray paint job.
If you don’t mind getting your hands spray-painted on, then you can do away without the gloves.
The face mask and goggles are both critical gear, though, as they can help prevent harmful VOCs from getting into your eyes, nose, and mouth.
8. Cleaning Tools
To keep everything clean, you will also need a soft-bristled brush and some flannel or
Step-by-Step Guide to Painting a Rifle Scope
After preparing your workspace and gathering all the necessary tools and supplies, you can go ahead and start painting.
Here’s how to do it properly:
Step 1: Prep
Workspace setup and procurement of tools are essential parts of the prep stage.
Even more so, it also focuses on the preparation of your workpiece.
Your scope has to be totally clean for the paint to adhere completely.
Get rid of dust and dirt by brushing all over every surface using the soft-bristled brush.
Consequently, you can remove oily residues and small fibers by wiping the entire piece with a
Step 2: Masking
After cleaning your scope, proceed with masking the parts that shouldn’t have paint on them.
Cover the lenses with some paper trimmings and affix them with some masking tape.
To get more professional-looking results, make sure to tape curves and straight edges continuously.
Also, tape around the movable joints of the turrets and knobs so that the paint won’t go into the small crevices.
Step 3: Primer
After covering all the essential surfaces with masking tape, you can start applying the base coat.
The base coat will depend on the final finish colors of your design.
If you plan to color your scope with bright paints, use a white base.
On the other hand, use an earthly tone, such as olive green or tan, if you are doing traditional camouflage.
You can avoid drip marks and create even coats by regularly moving your arm in one direction while spraying.
Sometimes, if you use a colored primer, it works perfectly as the base color for your entire finish.
It is imperative that you wait for the primer to dry completely before proceeding to the next step.
Fortunately, spray paints typically dry fairly quickly, unlike other types of paints.
Step 4: Decoration and Finishing
You will want to use a second contrasting color or an entirely different color for your finishing touches.
Are you using a pattern or a template?
If so, set it over the workpiece, and spray over it as you normally would without the template.
Then, reposition the template if you want to use it on another part, but switch between the other colored spray paints you have.
Repeat this process until you get the desired results.

Step 5: Cleanup
For the final step, wait for the entire paint job to dry before removing all the masking materials.
Then, check whether all the lenses are clean and the turrets are still functioning properly.
Conclusion
Quality rifle scopes already cost a fair amount of money, but they would cost even more with some customization.
Fortunately, a custom paint job with some spray paint is not difficult to do.
All you need is to prepare the necessary tools and supplies and follow the easy steps we listed here.
You will find that it is a fun activity; in fact, it is one you can share with someone who shares a shooting hobby.