Why do you want to Camouflage your gun?
Camo painting a gun is a fun and easy customization to make it your own. No one will have the same paint job as you have when you paint your own gun. You may want to camouflage your rifle to better match your environment or you may want to make a statement. Some striking colors may give you the look you want.

I feel like camo painting your gun is a personal choice. You can try and break up the lines of your gun for hunting, but movement may be more of a give away than the look of the gun. Think of it as an art project to get the colors and look you want.
Starting out with a plain unpainted gun in-front of you, it can be a bit daunting to commit to the paint. You will need to be able to disassemble your gun if you are going to paint it. The most important reason for the disassembly is to clean the gun, the cleanest it has ever been. You cannot have any oils on your gun, or it will affect the quality of the paint job. Follow our cleaning guide below, but just remember not to add any of the oils.
The other reason for disassembly is if you are going to use a bake on paint. Not all parts of your gun can go into the oven at the temperature required for bake on paint.
Different methods
There are a lot of different ways to camouflage your gun. There are water transfers, stencil kits, stickers and hand painting.
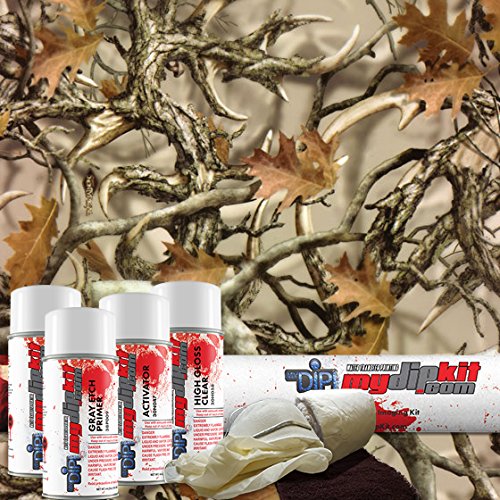
Water Transfer
If you want a photo-realistic camo, the water transfer may be for you. Search Hydrograhics Film for any look you have in mind for your gun. There are primers and activators involved so you may want to practice on objects other than your gun if you have never used a water type before. The pros are you can have a photo-realistic look. The cons are it is very easy to wreck the application. Check out this video below to see a professional.
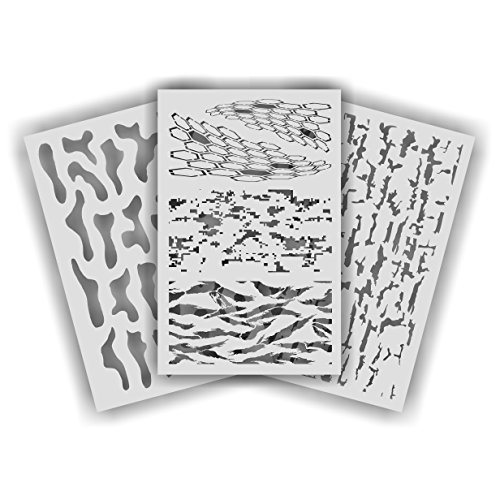
Stencil Kit
The camo stencil kit is a reusable sheet with holes of varying designs cut out. This means you are going to spray over the stencil holes to create a shape in the color you are holding. The downside of a stencil is it will not conform closely to the shape of your gun. The pros are that it is a simple and reusable method.

Stickers Kit
Stickers when applied to your gun will protect the color under the sticker. So when you spray on your next color the first color will be underneath. You can layer the stickers and keep spraying different colors to get the look you want. Some stickers are applied as holes and you will then be changing the color of the hole as you spray.

The pro’s of the stickers are they conform well to the gun and you can choose where they cover with more control than a stencil. The downside is that the thickness of the sticker holds the paint at the edge. This can lead to a thicker paint line around the sticker. To combat this I would spray very lightly when applying the color layers.

Hand Painting
Spray painting by hand is a great way to camo your gun. If you are super artistic you could also go ahead with a brush and paint whatever you wanted on your gun. Some people also use a sponge to apply the paint. But for most people, you will get a great look by finding local foliage to spray over and create a look. The pros are that your gun will be unique. The cons are that you could lose control, and end up with a kind of ugly paint job. Not to worry you can always strip off the paint and start again.

Types of paint
If you are going to paint your gun you should use quality paint. Fizz cans are a cheaper and faster choice. There are many spray paints made just for camo painting. Your rattle can paint job can look good but may not last as long a Cerakote type paint. You can use an air-dry Cerakote type paint, or you can choose a bake on paint for the strongest finish.
With the spray can you do not need a paint gun or an air compressor. You also do not need an oven, just time for the paint to reach full strength. When you use liquid paint you are going to need a few more tools but the paint is better quality and will last longer.

How we DIY Camo Painted our guns
We chose two different methods on two different guns to compare the results. On one gun we painted using a sticker kit and hand-painted the other. We used air dry Cerakote and bake on Ceracote. To spray the paint, we used a small automotive touch-up spray gun. On the handpainted gun, we used an airbrush. Both guns look great, but we did have a preference in the end.
Sticker Kit on a Short Barrel Rifle
For this short barrel rifle, or SBR we chose a sticker kit for the camouflage paint job. The look for this gun was to be camo but have an overall black look when it was finished. The black was to tie into the parts that were added that could not be painted. Because of the black, the sights, pistol grip, and flashlight tie in well.
We used a bake on paint. Each color was baked at a lower temp, 150°C for an hour between colors so we could add another layer of stickers and paint again.


Hand-Painting on an AR10
The goal of camo painting our AR was to better blend into the environment. We shoot in the high desert where it is scrubby bush and not much green. Air brush spraying over natural foliage was how we got the look. The AR was already a light tan which made a great base color for the camo paint.


Order of application
The starting point of any paint job is a super clean gun. Next, you pick your base color. On the SBR build the gun started out life black. So we stripped off the existing paint in our water blast cabinet. This gun stayed in pieces throughout the camo painting as it was a bake on paint. It had to be in pieces to fit in our oven.
Camo Painting Using Stickers
After the gun was all light tan, we applied the smallest amount of stickers so that the tan would be just a highlight color.


The process of camo painting with stickers and bake on paint was slow. Once the base coat was on we had to flash off for one hour at 150°C and apply the first layer of stickers. After painting the next shade of flat earth over the stickers, the parts returned to the oven and baked for another hour.
More stickers were added and the third color, dark green, was painted on. After another hour in the oven, another layer of stickers protected this color from the last layer of black. After flashing off the last layer, we removed all of the stickers and baked the paint to its full temp of 350°C for 1 hour. The Cerakote is full strength after the last bake. So as soon as the gun is cool it can be reassembled.


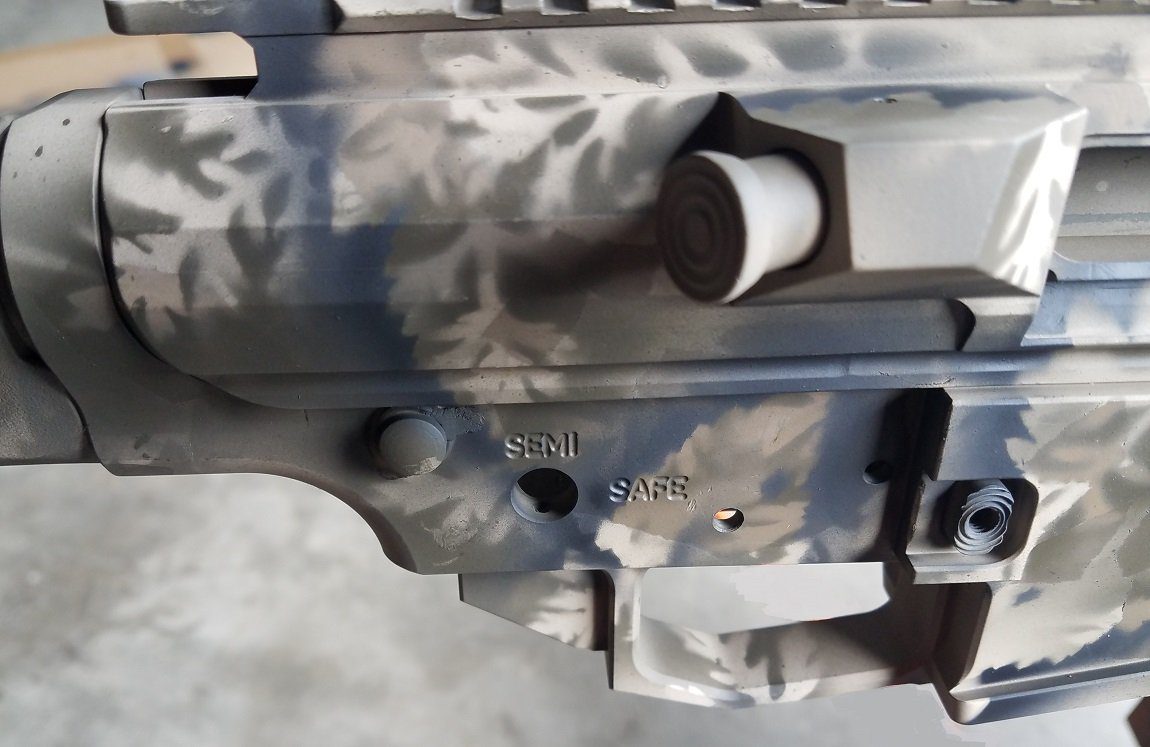
Camo Painting using Foliage
Painting the AR-10 with air dry paint was much faster than using the bake on paint. With the air-dry, all the colors went on with no time between coats. Because it was fast you have to be careful about touching the gun. We put the gun together without the barrel, bolt, butt plate, grip, and trigger. Then we rigged this shell onto a stick so we could work our way around the gun and rotate as needed.
The AR started out as a light tan so it did not need a new base coat. Again, just a total thorough clean. First, we used masking tape to block out areas to stay light tan before we went a shade darker.


After the first color we removed the tape. This became the base for the foliage painting. From the garden we grabbed a few leaves and held them against the gun. It took two of us to do this camo painting because one of us held the plants down while the other airbrushed over them. I have seen many videos where they just lay the foliage on the gun. We found the air pressure blew off the leaves if we did not hold them.


After holding the leaf and spraying the dark earth color all over we stepped back and took a look at the finish. The camo paint looked good, but we felt it needed a bit more.
Looking at the leaves, we found a nice serrated edge. We held this edge down tight and added a tighter black airbrush just on the edge. When the painting was finished we had to leave the gun untouched for 24 hours. After 5 days the paint is full strength and we could reassemble the rifle.

Conclusions on camo painting a gun
Knowing when to stop might be the hardest part of camo painting a gun. After you get over your initial fear of messing up your gun, camo painting can be fun.
The sticker method was more controlled than the plant airbrushing. But the sticker method took a long time. A big problem with the time was that all the paint had to be on by 12 hours. So once we started we had to keep going.
The airbrushing took two of us but it was much more dynamic. We could keep adding till it looked good to us. One problem was trying not to touch the very wet paint. To help with this we moved around the gun a lot. Spray painting with fizz cans would be very similar to this method. The airbrush has way better paint control and I believe it made for a better camo paint job. Waiting for the paint to reach full strength should be taken into consideration. Don’t try and paint your gun two days before a hunt!
Go ahead and plan your camo painting. Get over the fear and make your gun your own by using any of these methods.